
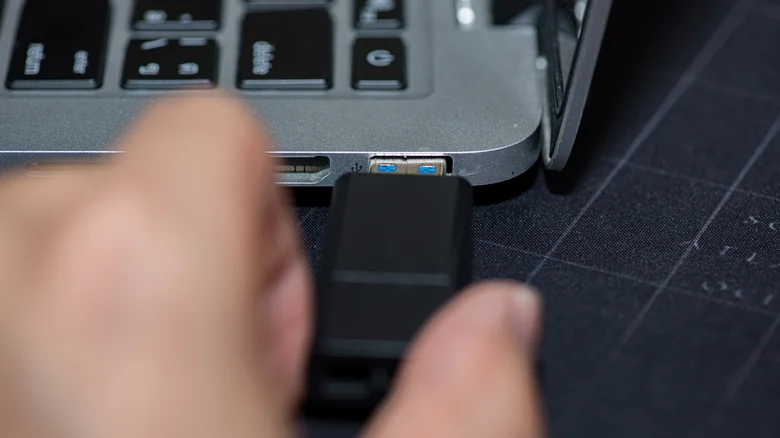
Experiencing a USB drive not appearing is a common issue on Windows that can deeply frustrate users. Picture investing hours in a project, saving it to your external USB drive, only to find that when you connect the drive for a presentation, it fails to show up. Despite repeated attempts, the drive remains elusive, often accompanied by error messages or no response whatsoever. This setback can lead to significant work loss, decreased productivity, and other inconveniences.
There are several potential reasons for a USB drive not appearing on Windows. Hardware problems such as damaged drives or faulty USB ports are frequent culprits. Software issues such as outdated or corrupted drivers can prevent your computer from recognizing external drives. Additionally, the USB drive’s file system may be corrupted or unsupported by Windows, or conflicts with drive letters may also prevent detection.
If you’re grappling with this frustrating issue, this guide offers a series of solutions with clear, step-by-step instructions to resolve it. These steps have been tested on Windows 11 but are also applicable to Windows 10.
Initial Steps to Resolve USB Drive Not Showing Up
If you haven’t already, begin by trying a different USB port. The current port may be damaged or obstructed. If your device only has one port, use a dry cloth or canned air to clear any debris before reconnecting the USB drive.
Next, connect your USB drive to another device with a different operating system. If it appears on that device but not on your computer, the issue likely lies with your computer rather than the USB drive. If it still doesn’t show up, there may be a formatting issue or the drive could be damaged.
Some external hard drives require a separate power source to operate. Ensure the power source is active if you’re using such a drive, allowing your PC to detect it. If you’re using a USB hub due to a shortage of ports and have connected your drive through it, try plugging it directly into your computer’s port as USB hubs may not always function correctly.
Lastly, check if your drive is visible in Windows Disk Management. Right-click the Start button and select Disk Management from the menu. Look for your USB drive in the list. If it appears, you may need to format it or assign it a drive letter.”
These steps provide a clear approach to troubleshooting the issue of a USB drive not appearing on Windows.
Assigning a Drive Letter Using the Disk Management Tool
Windows features a robust Disk Management tool that allows you to manage both internal and external drives on your PC. You can use this tool to create or delete partitions on your hard disk as well. If your drive appears in Disk Management but not in File Explorer, it may be because the drive is hidden since no letter has been assigned to it.
It’s possible that the USB drive was assigned a letter that is already in use by another drive, or it may have been inadvertently removed due to changes in the registry or group policy.
To resolve this issue, you can manually assign a letter to the drive. Here’s how to do it:
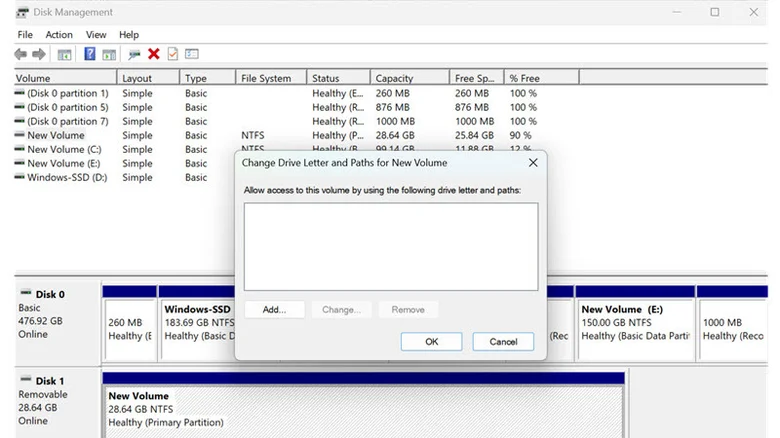
Press Windows + X on your keyboard and choose Disk Management from the Power Menu.
Locate your USB drive, which currently lacks an assigned letter.
Right-click on it and select Change Drive Letters and Paths.
Click Add to proceed.
Next, expand the dropdown menu beside ‘Assign the following drive letter:’
Choose an available letter for your USB drive and click OK.
That’s it. Open Windows File Explorer, and your USB drive should now be visible. Double-click on it to verify accessibility.
Format the Drive
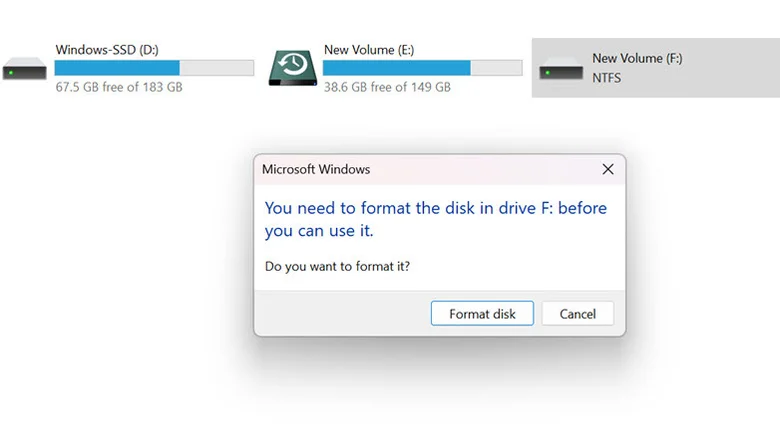
If you encounter the “You need to format the disk in drive” error when inserting your USB drive into your Windows PC, it suggests that the drive may be corrupted or Windows cannot recognize its file system.
You have the option to format the drive by clicking the Format Disk button on the error message. However, be aware that formatting will erase all data on the drive. Therefore, if your drive contains important data, it’s crucial to first back it up. Insert the drive into a different operating system that supports its current file system, such as macOS, Linux, or even Android if possible. Once you’ve safely saved your files on another device, you can proceed with formatting.
To format the Unallocated disk, follow these steps in Disk Management:
- Launch Disk Management and locate the Unallocated disk.
- Right-click on the Unallocated space and choose “New Simple Volume.”
- Follow the wizard to specify the volume size (or use the maximum size by default), assign a drive letter, select a file system (typically NTFS), specify a volume label (optional), and proceed.
- Review your selections and click “Finish” to start the formatting process.
These steps will format the Unallocated disk and make it ready for use. After formatting, your drive will be empty and ready for use.
Utilize Device Manager
If your USB drive works on other devices but not on your PC, there may be a driver issue. First, attempt to disable and then re-enable the drive using Device Manager. Here’s how:
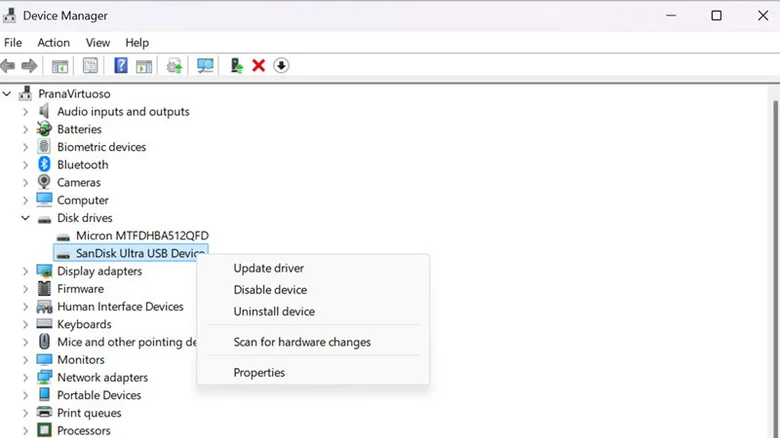
Press Windows + X and choose Device Manager from the menu.
- Expand the Disk Drives section.
- Locate your drive, right-click on it, and select “Disable device.”
- After a few moments, right-click on it again, and select “Enable device.
After completing the steps above, verify if the drive appears. If it doesn’t, consider rolling back the drivers if the issue arose after a recent Windows or driver update.
In Device Manager, locate the driver for your USB drive. Right-click on it and select Properties.
Navigate to the Driver tab and click the “Roll Back Driver” button. If the option is greyed out, skip this step.
Follow the on-screen instructions to complete the driver rollback process.
Next, update your USB port drivers. This ensures that any issues caused by outdated USB drivers are resolved.
In Device Manager, locate the “Universal Serial Bus Controllers” section and expand it.
Right-click on each USB controller and choose Update Driver.
Follow the prompts to complete the USB port driver update successfully.
Update each USB port driver one at a time by following the same procedure for each.