
With the surge in iPhone photography, you probably have a vast collection of pictures on your device. Ideally, you’d keep them all there, but limited storage means you’ll need to move them eventually. While iCloud is a popular choice, it’s not ideal if offline access is crucial. Instead, using local storage like a Windows PC might be better.
The catch is that transferring photos isn’t as simple as with Android devices, which use Bluetooth for file transfers. iPhones limit Bluetooth to device connections only, so alternative methods are necessary. We’ll guide you through six straightforward ways to transfer your iPhone photos to your PC.
Method 1: Access iCloud Photos from Your PC’s Browser
iCloud Photos automatically syncs with the Photos app on your iPhone, uploading your pictures and videos to your iCloud account. These files retain their original resolution and HEIF/HEVC format, so you won’t lose image quality (though you should ensure your iCloud storage is sufficient). Since iCloud is accessible from any browser, it’s a straightforward way to transfer photos wirelessly from your iPhone to your PC. Here’s how to set it up and access your photos:
- On your iPhone, open the Settings app.
- Tap your name at the top of the page.
- Go to iCloud > Photos.
- Enable Sync this iPhone if it’s not already turned on.
- On your PC, open your preferred web browser.
- Go to icloud.com and sign in with the same Apple ID used on your iPhone.
- When prompted, press “Allow” on your iPhone and enter the six-digit code to proceed with the sign-in.
- (Optional) Select “Trust” to avoid entering a verification code in the future.
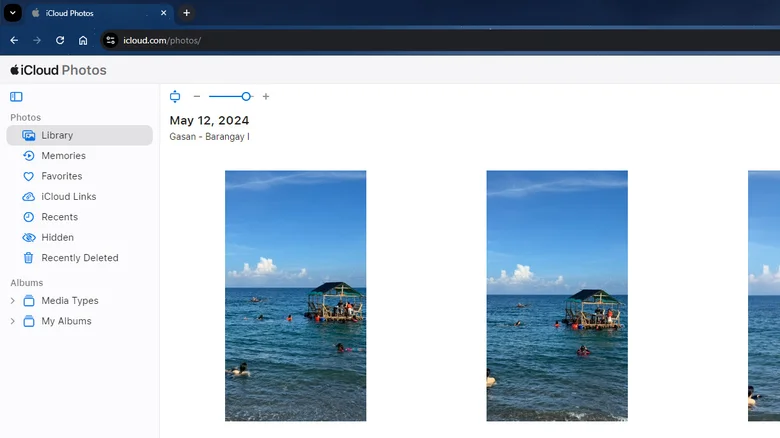
- On the iCloud homepage, click the Photos section.
- Browse your library to find the photo you want.
- Double-click the image to view it.
- Click the download icon in the upper-right corner to save the photo to your PC.
- To download multiple photos, hold down the Ctrl key and select the images you want. Then click the download button at the top. The images will be saved in a ZIP file, which you’ll need to extract.
Your downloaded photos will be available in your PC’s Downloads folder.
Method 2: Import Your iPhone Photos Using the Windows Photos App
If you need to transfer a large number of photos to your PC and find downloading from iCloud too complex, you can use the Windows Photos app as a convenient alternative. The Photos app allows you to import images and videos directly from connected USB devices such as your iPhone, making the process simple and efficient. Here’s how to do it:
- Connect your iPhone to your computer using a USB data cable.
- Open “This PC” to check if your device is recognized. If your iPhone doesn’t appear in the list of USB devices, try unlocking your phone first.
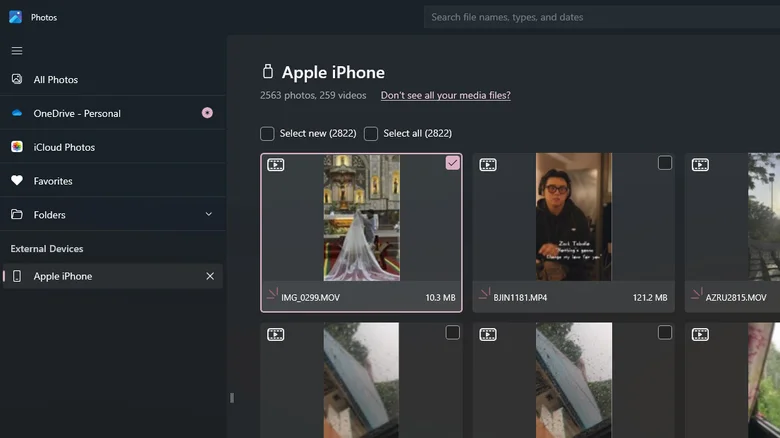
- Open the Photos app on your Windows computer.
- Click “Import” in the top right corner of the screen. You should see an option for “Apple iPhone.”
- Select “Apple iPhone.”
- If you receive a “We couldn’t reach your device” message, unlock your iPhone and tap “Allow.” Then, go back to the notification on your computer and click “Retry.” Your photos and videos stored locally on your iPhone (not in iCloud) will now be imported into the Windows Photos app. This may take some time depending on the number of images.
- To select photos, check the box in the top-right corner of each image. To select all media, click “Select all” at the top.
- After selecting the photos you want to transfer, click “Add items.”
- Choose an existing folder to save the images or click “Create folder” to make a new one. Note the directory displayed at the top, as this is where you’ll find your photos later.
- Click “Import.”
- Verify the transfer by opening the selected folder.
- Once the import is complete, you can disconnect your iPhone from your PC.
Method 3: Transfer Photos Using Windows File Explorer
To quickly transfer photos from your iPhone to your PC, connect your device with a USB data cable. This will make the images and videos stored on your iPhone immediately accessible from your PC. Compared to using the Windows Photos import method, this approach is faster because you won’t have to wait for your entire media library to load. Follow these steps to transfer your iPhone photos to your PC using File Explorer:
- Connect your iPhone to your PC using a compatible USB data cable.
- On your iPhone, tap “Trust” when prompted to allow your computer to access your data.
- Open Windows File Explorer if it doesn’t open automatically.
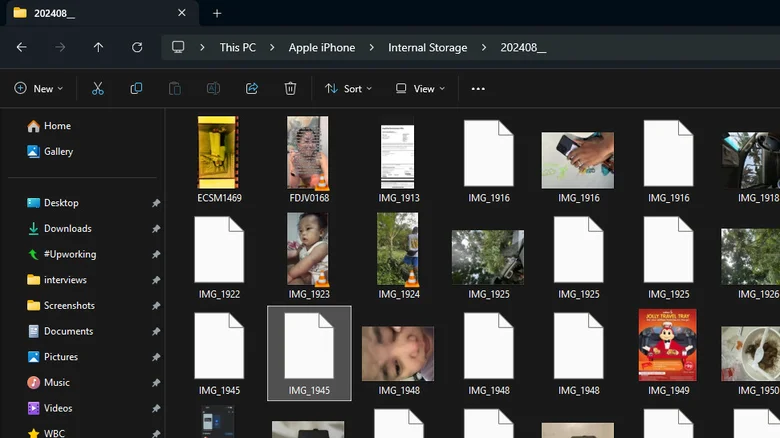
- Navigate to “This PC” in File Explorer.
- Select “Apple iPhone” from the list of devices.
- Open “Internal Storage” to view your iPhone’s media files.
- Locate the images you want to transfer. Folders are organized by year and month, so find the one corresponding to the time the photo was taken. For recent photos, look for the current year and month folder.
- (Optional) Change the view size to make it easier to browse. Click “View” at the top and choose “Extra large icons” for larger photo previews.
- Select the photos you wish to transfer.
- Drag and drop the selected images to your Desktop, located in the left-side panel. The photos will be copied to your Desktop folder, where you can view them.
Optional Step: If you want to convert your photos from HEIC to JPG or PNG, double-click on the image to open it, then press Ctrl + S to save. In the “Save as type” dropdown, select your preferred format before saving.
Method 4: Use a Wireless Flash Drive App
Tired of hunting for a USB cable? Transfer your iPhone photos to your PC wirelessly using an app like AirDisk. Here’s how:
- Install AirDisk on your iPhone.
- Open the app and proceed through the welcome screens.
- Tap the plus icon on the home page.
- Select “Library” and grant AirDisk “Full Access” to your photos.
- Choose the photos you want to transfer and tap “Import.”
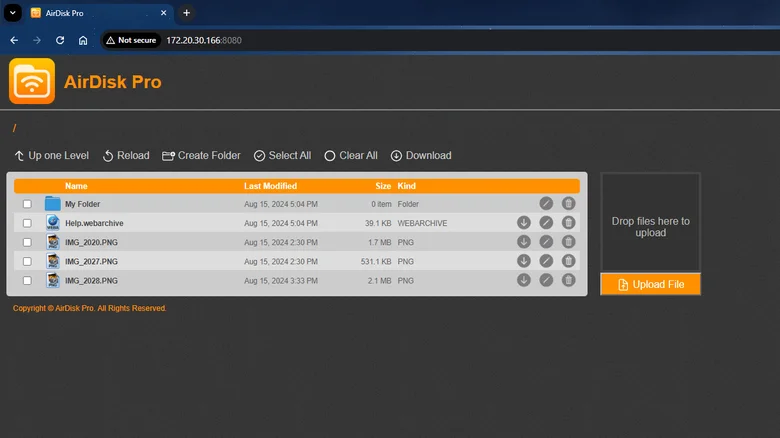
- Tap the “Sync” button and select “Wi-Fi File Transfer” to get an IP address.
- On your computer, connect to the same Wi-Fi network and enter the IP address in your browser.
- Download the images you want from the browser.
- Find the ZIP file in your PC’s Downloads folder and extract it to view your photos.
You can also use AirDisk to send files from your computer to your iPhone by dragging and dropping them into the browser. Remember, closing the Wi-Fi Transfer dialog on your iPhone will end the connection.
Method 5: Transfer Photos Wirelessly with Snapdrop
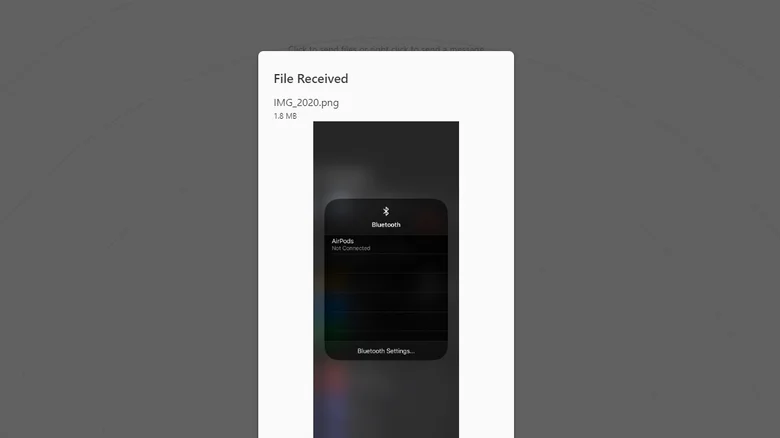
If installing a transfer app isn’t ideal for you, try Snapdrop—a free, browser-based file transfer service. Here’s how to use it:
- Connect both your iPhone and PC to the same Wi-Fi network.
- Open snapdrop.net on both devices.
- Note the usernames displayed at the bottom of the page for both your iPhone and PC.
- On your iPhone:
- Tap your PC’s name.
- Choose “Photo Library” and select the images you want to transfer.
- Tap “Add” in the upper-right corner. The photos will transfer to your PC, and you’ll see a “File transfer completed” message.
- On your PC:
- Click “Save” on the File Received notification.
- To save files automatically, uncheck “Ask to save each file before downloading.”
- Click “Allow” for the “Download multiple files” notification.
- Find your photos in the PC’s Downloads folder.
Method 6: Use Messaging Apps

If you want a simple way to transfer images from your iPhone to your PC without needing USB cables, consider using messaging apps. This method is convenient since many people use messaging apps daily. Telegram is a great choice for this purpose, allowing you to send files up to 2 GB. Here’s how to transfer your iPhone images to your PC using Telegram:
- Install Telegram on your iPhone if you haven’t already.
- Log in or create a new account.
- Tap on “Settings.”
- Select “Saved Messages” to open a private chat only you can access.
- Tap the attach icon in the bottom-left corner.
- Choose the images you want to send to your PC (up to 100 photos at once).
- (Optional) Add a caption for context.
- Press “Send.”
On your PC:
- Open a browser and go to web.telegram.org.
- Click “Log In By Phone Number” and sign in to your account.
- Open “Saved Messages” from your conversation list.
- Click on the image to open it.
- Hit the download icon at the top to save the photo to your PC.
Note: Telegram doesn’t support bulk downloads, so if you have multiple images, you’ll need to download them individually.